
Use Postman to configure CSR1000v router on Cisco Sandbox with RESTCONF
Postman and RESTCONF are two topics that we need to grasp in the ENCOR exam so in this tutorial we will learn the basis about them. In order to complete this tutorial, please download and install Postman first. This is a simple task so we will not mention it here.
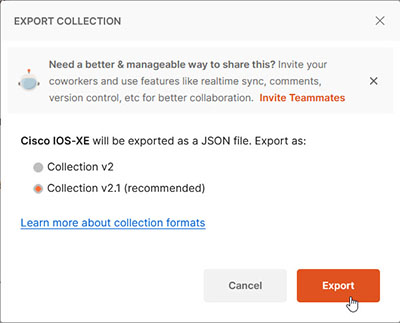
After installing Postman, go to this Postman link and export the Cisco IOS-XE collection to a file on your local drive because we are going to communicate to a Cisco IOS XE router via Postman.
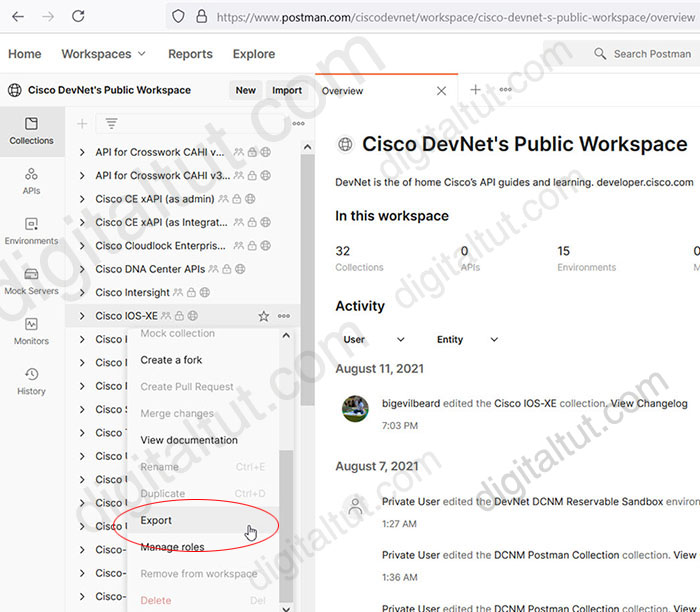
Choose the latest version of Collection is better so we will choose “Collection v2.1”.
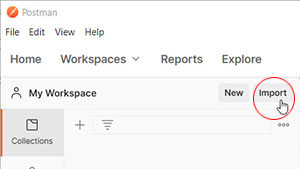
Now open Postman to import the collection by clicking on “Import” button:
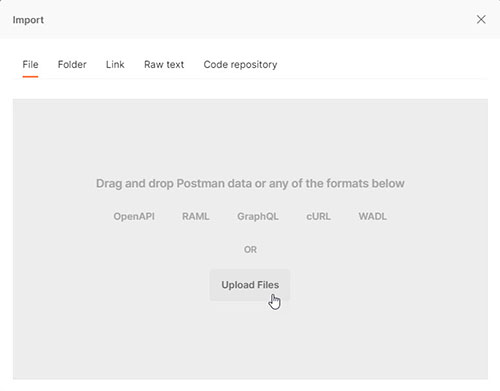
Choose the downloaded file to upload:
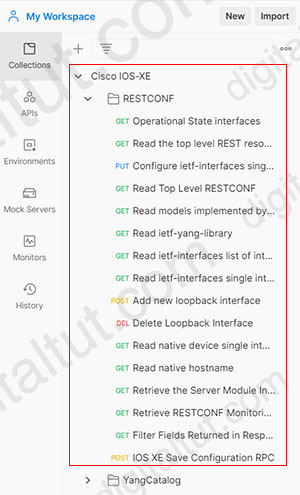
And now we have a list of RESTCONF APIs (commands) under “Cisco IOS-XE” collection to play with.
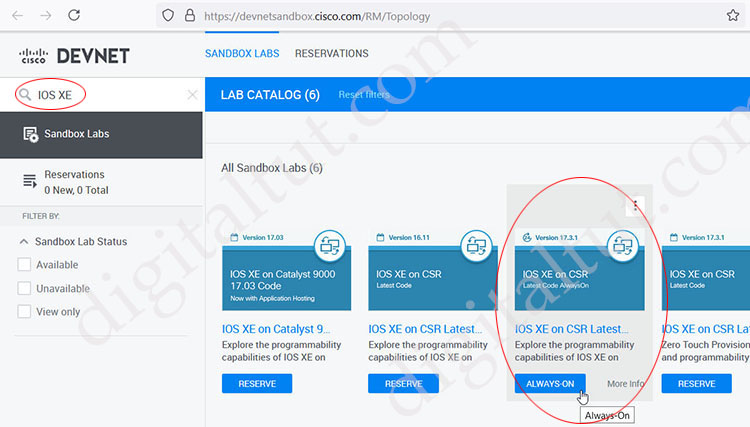
But where will we send these commands to? It is nice that Cisco offers many free devices online to practice with in the DEVNET program. You can visit this link: https://devnetsandbox.cisco.com/RM/Topology and search for “IOS XE”. The website returns a list of labs but we should choose “IOS XE on CSR Latest …” (Always On) lab as we don’t have to wait to reserve and use it like other labs.
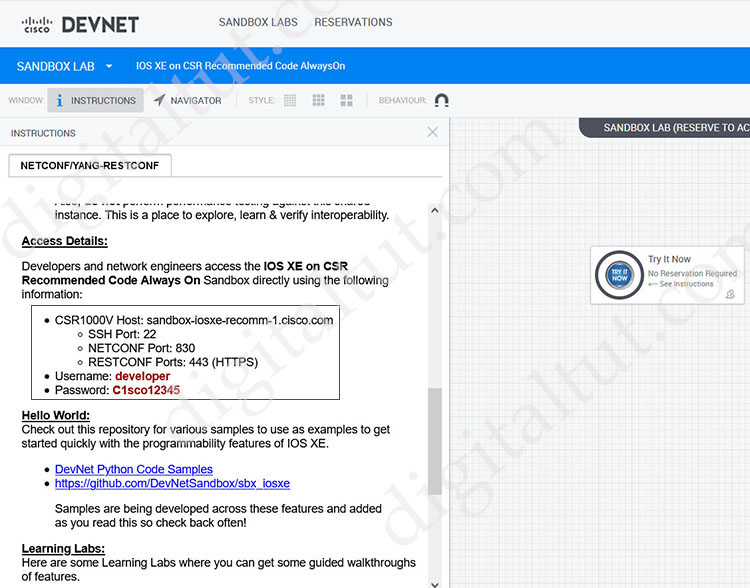
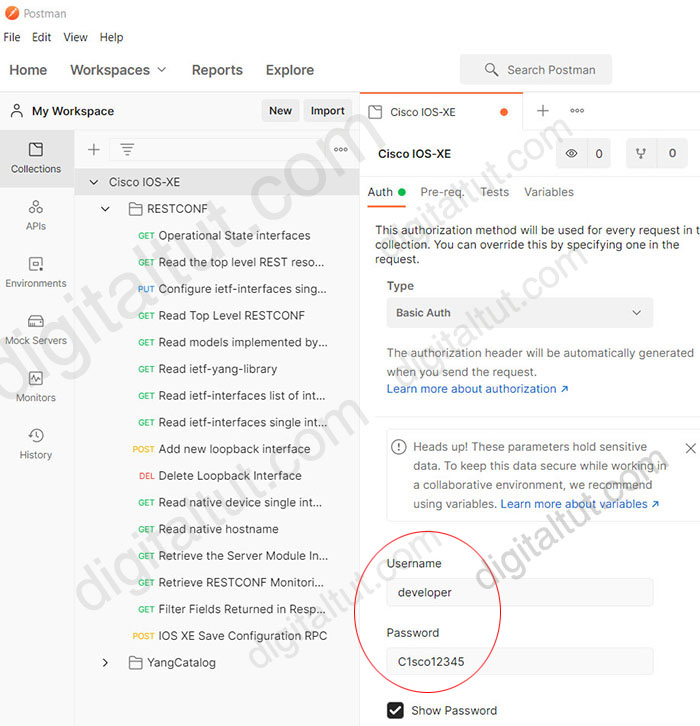
After accessing this lab, all the information we need is in the red box below. It tells us where to send our RESTful APIs in Postman to along with the username and password.
Now return to our Postman, we will provide the username and password provided above to the “Basic Authentication”.
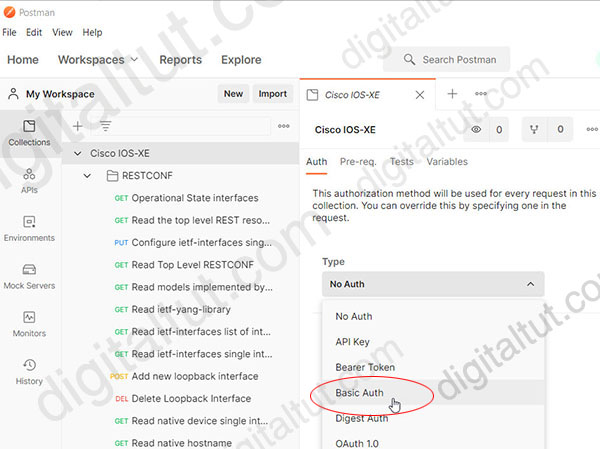
In the “Type” drop-down box of “Auth” tab, choose “Basic Auth” and enter the username “developer” and password “C1sco12345” as provided in the Cisco sandbox website above.
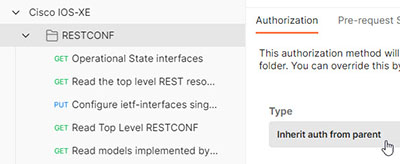
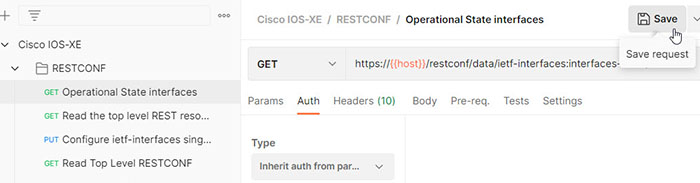
Set “Inherit auth from parent” for sub-category “RESTCONF” so that it will use the authentication information from parent node “Cisco IOS-XE”.
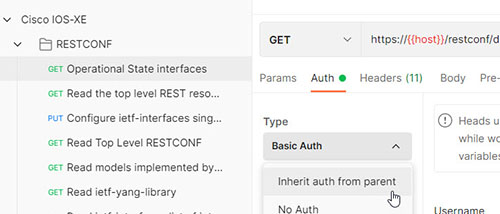
In each RESTful API we are going to send, we also have to choose “Inherit auth from parent” too.
Define variables
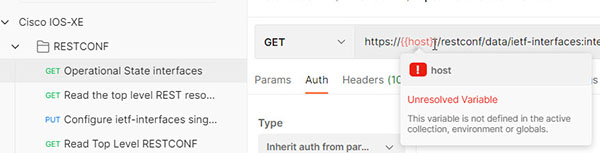
After setting the authentication, now we can have a closer look on the RESTCONF commands. When hovering mouse on {{host}} in the URL, we can see an “Unresolved Variable” popup. It means Postman has not learned how to interpret this {{host}} variable yet.
In order to define this variable, click on the eye icon at the top-right corner of Postman and choose either “Add” Environment or Globals.
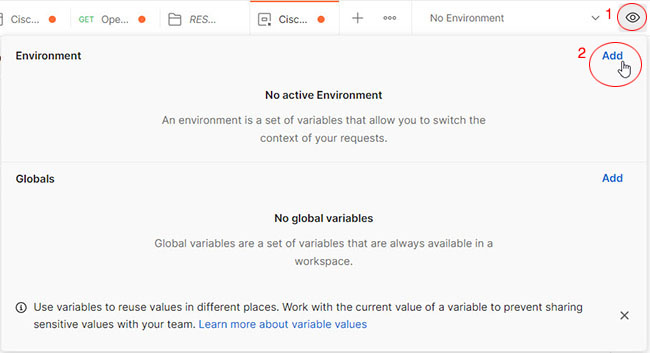
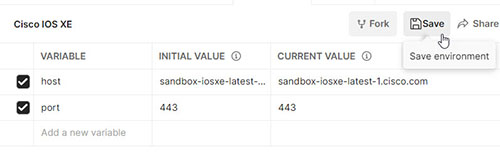
Type “host” in the VARIABLE field to define this variable. In the INITIAL VALUE, copy the value “sandbox-iosxe-recomm-1.cisco.com” from the Cisco DEVNET website and paste here.
Same for “port” variable. Name this environment “Cisco IOS XE”. Then don’t forget to click on “Save” button.
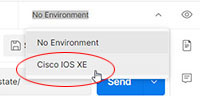
After saving we will have a new environment with name “Cisco IOS XE”, select it.
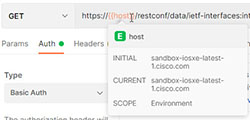
Now we see our {{host}} variable has been resolved by the green icon “E” when hovering on it:
Remember to change Auth Type from “Basic Authentication” to “Inherit auth from parent” for each request we are going to send, then click on “Save” to save all the settings for this request. Unfortunately, we have to save each command for the first time.
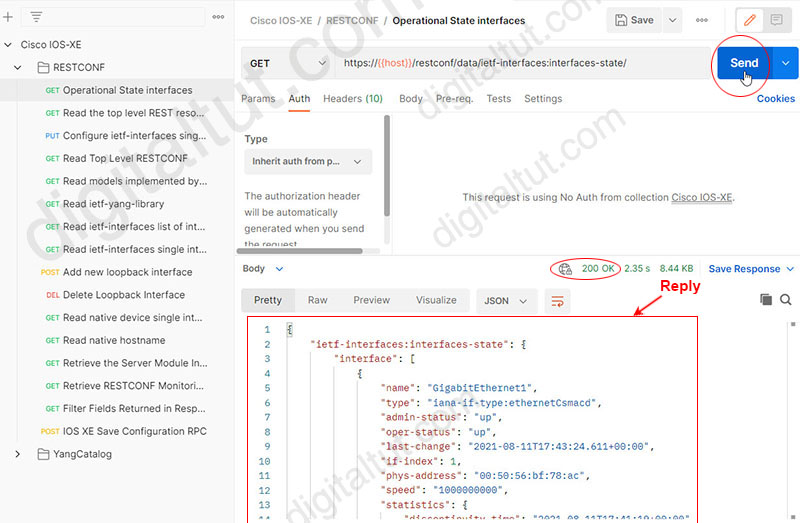
Click “Send” and wait for a few seconds then we will receive the reply, notice the returned code is “200 OK”. The command we sent is a “GET” command, which is equivalent to a “show” CLI command. In this case we sent a “GET” interface state on this router.
After getting information of interfaces successfully, we can try some configuration on the remote device.
|
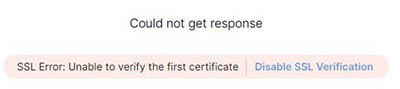
Note: If you receive the error “Could not get response” SSL Error: Unable to verify the first certificate” then please click on “Disable SSL Verification” or you can disable it in Settings > SSL certificate verification
|
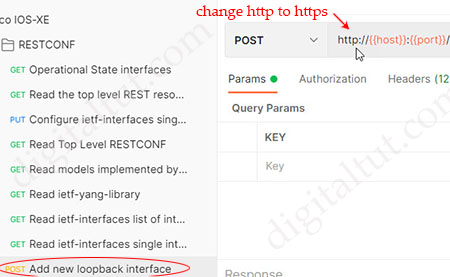
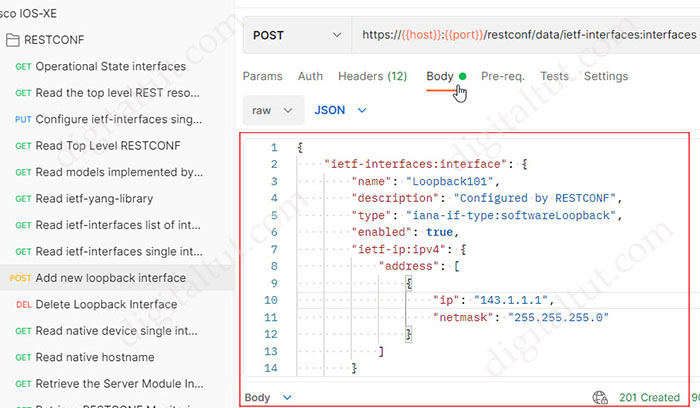
Create a Loopback interface
Choose “Add new loopback interface” in the command list. Check the URL carefully because some are configured in http by default so if we submit them they will fail. Please change them to https instead:
Configure new Loopback interface information in the “Body” part with the following information:
+ name: Loopback101
+ ip: 143.1.1.1
+ netmask: 255.255.255.0
Keep other information unchanged, then click “Send”. We will see a “201 Created” reply.
Delete a Loopback interface
Next we will delete the Loopback 101 we have just created. We just need to type “Loopback101” at the end of the command. If everything is correct, we will be replied with status “204 No Content”
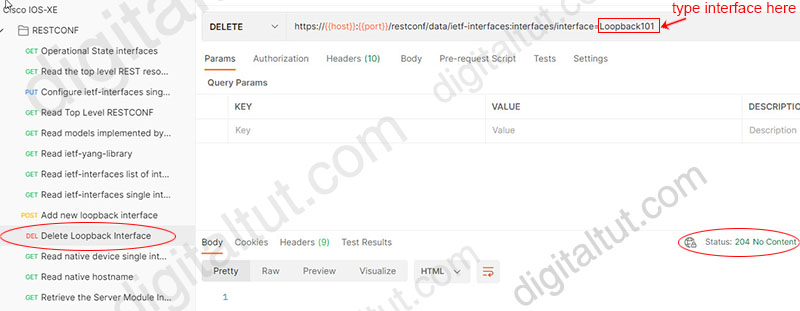
Note: HTTP status code of 2xx means “Success”, which indicates that the client’s request was accepted successfully.
You can find some other labs in this Cisco Live PDF (backup link here). It is a good resource to learn about Postman and RESTCONF.


Superb content
Good Example for RESTCONF STUDY.
Excellent example
Anyone, is there a PDF version of the info? I want to create a VCE which helps me learn faster.
Can you share vce player please
Supper cool excercise!
If you get no 200 OK then go to the Settings tab and Turn OFF “Enable SSL certificate verification”
Turn off “Enable SSL certificate verification” if receive no 200ok
off > Enable SSL certificate verification
last dump?
Nice , very nice work guys. Thank you !
Hi,
I follow the steps here but still, 502 Bad Gateway
Already off “Enable SSL certificate verification”
502 Bad Gateway
502 Bad Gateway
nginx/1.13.12
use “lastorangerestoreball8876” as password, credentials shared here was not updated.
“unauthrized” someone could help me
Thank You
Not authenticating with:
Username – developer
Password – C1sco12345 or lastorangerestoreball8876
Are there any newer / working credentials please.
Can any one please send the VCE full on info dot messus at gmail dot com